Editing a LaTeX file
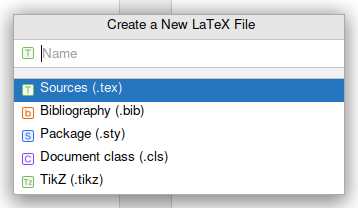
To create a new LaTeX file, either use or right-click in the Project tool window and select .
Manage the appearance for long lines
You can enable soft wraps by going to , enable Soft-wrap files and put **.tex in the text field, or just ** to soft-wrap all files.

In you can enable 'wrap on typing' and much more, see Code formatting settings.
Line commenting
By default, the shortcut Ctrl + / will add a comment (%) character to the beginning of the line. When multiple lines are selected, these will all be commented.
Note that the block comment shortcut Ctrl + Shift + / should not be used, as LaTeX does not have any block comments by itself.
Also see the option to set line comment at first column.
Multi-cursors
IntelliJ supports handling multiple carets at once, see https://www.jetbrains.com/help/idea/multicursor.html.
Styling text
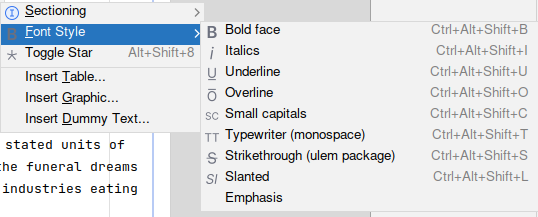
Insert font style commands like \textbf for bold face. If any text is selected, it will be used as argument to the command.
Inserting \section-like commands
Insert sectioning commands like \part or \subsection. If any text is selected, it will be used as argument to the command.
Add or remove the star of a command, e.g. switch between \section{...} and \section*{...}.
Surrounding selection with quotes or dollars
Since b0.6.9
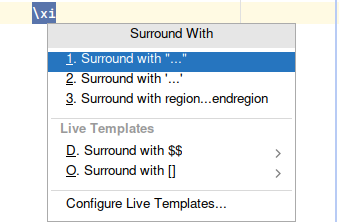
With some text selected, press Ctrl + Alt + T (surround with) to surround text with quotes, dollar signs (inline math) or braces. When surrounding with quotes, quotes will be inserted according to the Smart quotes settings. Use Ctrl + Alt + J (surround with live template) to surround with a live template, i.e., surround with dollars or braces. To surround a selection with dollars, it is also possible to simply press $.
Automatic package importing
By default, TeXiFy will automatically insert package dependencies when you use autocomplete on a command of which the dependency is known.
An example is the align environment, which is provided by the amsmath package. If you use the autocomplete to type \begin{align} ... \end{align}, you will see in the autocomplete window that align has the amsmath dependency. If you select it, then \usepackage{amsmath} will be inserted automatically, as you can see below.
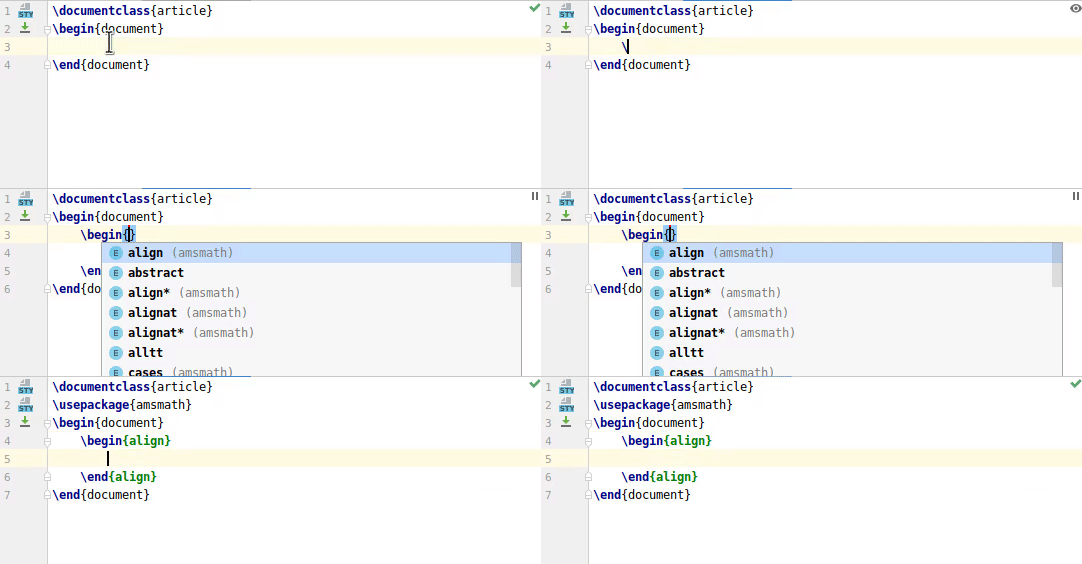
Note that not all commands' packages might be known to TeXiFy, see SDK settings for ways to help TeXiFy in this.
Renaming labels and environments
Since b0.6.9
Currently, refactoring (renaming) elements is supported for files, references and citations.
To rename a label, place your cursor on a label definition or reference, e.g. \ref{some-<cursor>label} and press Shift+F6.
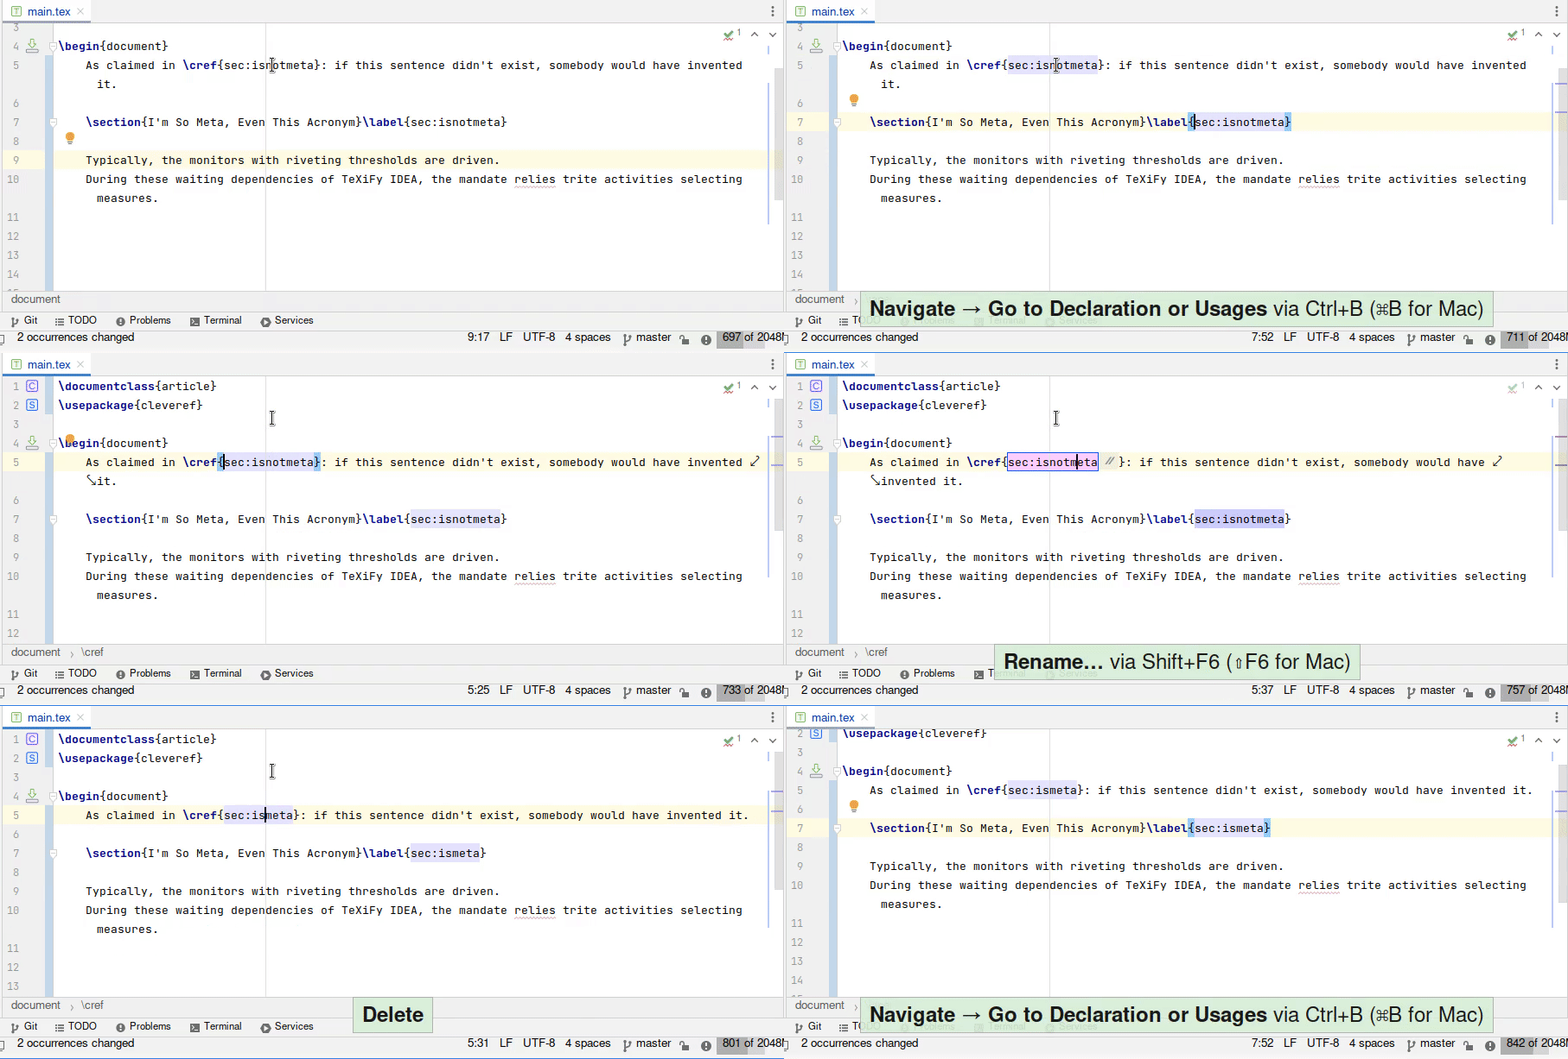
To find out what elements need to be renamed as well (definition and other usages), the functionality from Find usages is used.
You can also use the rename functionality to change an environment name in \begin and \end at the same time, i.e. replace
with
by making sure your cursor is on the environment name inside either the \begin or \end command and using Shift + F6, then type the new name.
When you try to rename an element for which refactoring is not supported, the element will simply not change or in some cases a warning "Inserted identifier is not valid" will be shown.
Switching between math environments
To switch between math environments, press Alt + Enter when your cursor is in a math environment. Then you can choose 'Convert to other math environment' and you will get a popup to choose from.
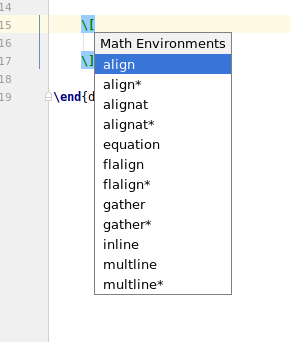
When you switch from an alignat environment to a different environment, the environment parameter will be removed.
Quick documentation
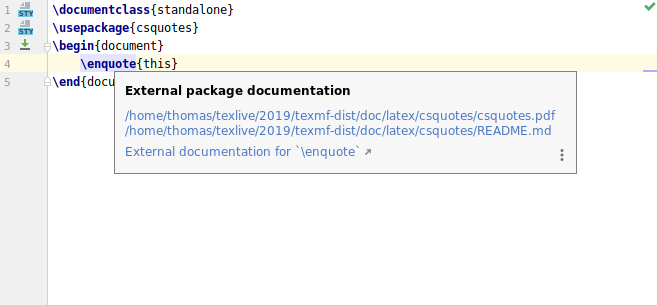
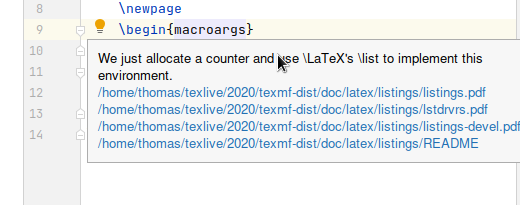
If you want to have quick links to package documentation pdfs, make sure you have installed texdoc, for example on TeX Live with tlmgr install texdoc. Then place your cursor on a LaTeX command and press Ctrl + Q. If the command has a package dependency which is known to TeXiFy, you will get a popup which includes links to the package documentation that is installed locally on your machine. LaTeX package documentation is written in LaTeX (surprise) so when you click on a link it will open a pdf.
When the command is a \usepackage or \documentclass then the documentation of the included package or class will be shown. When your cursor is on an environment name, documentation for that environment will be shown.
Note that you can also use the shortcut Ctrl + Q during autocompletion of commands and environments, and navigate through the completion list using the arrow keys.
Source of documentation
When you have set up a LaTeX SDK, in most cases you will have all commands and environments from all installed LaTeX packages in the autocompletion (see Autocomplete). In a lot of cases, this includes some documentation for each command and environment. However, this relies on package authors respecting the LaTeX conventions (using the doc package) whether the documentation is actually useful. If you find something incorrect, please let us know and then we can determine whether something needs to be improved in the LaTeX package or in TeXiFy (example bug report: https://gitlab.com/axelsommerfeldt/caption/-/issues/114).
Shortcuts
Note that all shortcuts are customizable, you can change them in .
General IntelliJ shortcuts
See https://www.jetbrains.com/help/idea/mastering-keyboard-shortcuts.html for more information.
Some useful shortcuts are for example:
Double Shift: Search for any IntelliJ command, like Reformat.
Alt + Enter: When your cursor is in a place where an inspection ribbon is shown, view the quick fix, if there is one. Apply the fix with Enter.
Ctrl + Alt + L: Reformat the file.
Ctrl + D: Duplicate the line or selection.
Alt + Shift + ↑ or Alt + Shift + ↓: Move the line up or down.
Ctrl + K: Commit and push changes with git.
Ctrl + T Pull changes with git.
Ctrl + Alt + <- Go back to previous cursor location.
Inlining files and command definitions
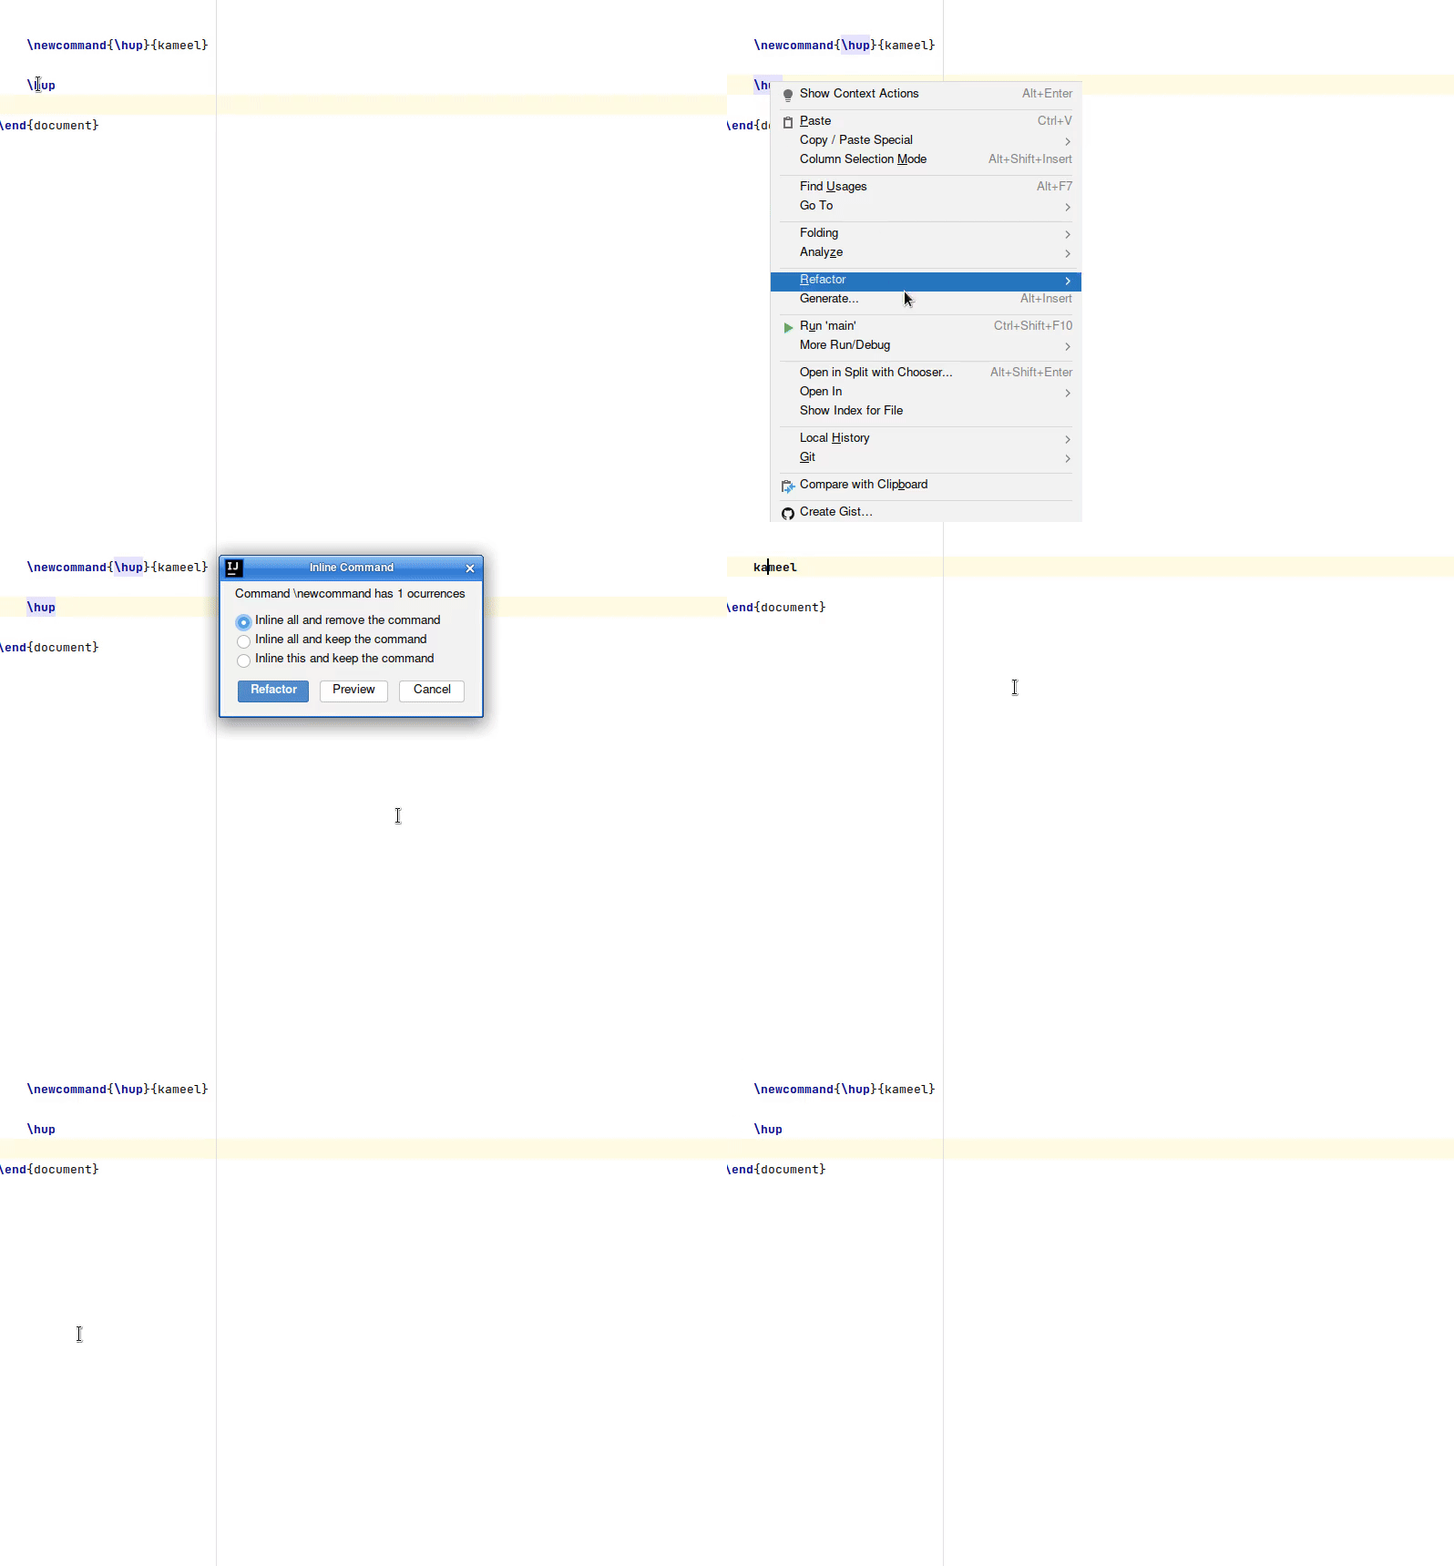
Nearly every JetBrains IDE offers a refactoring tool called Inline which allows you to replace every reference of something with its definition. TeXiFy implements this in the following way:
To perform this, you can right click an input command -> refactor -> inline and select what kind on inlining you are looking for.
Swapping command arguments
Using or by default Ctrl + Alt + Shift + Left/Right you can move/swap required arguments of LaTeX commands.

Magic comments
Since b0.6.10
Compilers
See Using magic comments to specify the compiler for new run configurations.
Root file magic comment
If TeXiFy does not guess your root file(s) correctly, you can help TeXiFy by using the root magic comment to point TeXiFy to a root file. For example, use %! root = main.tex in a file that is included by main.tex, when TeXiFy cannot figure out that main.tex is a root file of this file.
Language injection
See Language injection.
Custom preamble for math and tikz preview
See Preview.
Switching parser off and on
If you want to temporarily switch off the parser for a part of your LaTeX, for example because there is a parse error which is causing other problems in your files, you can use the magic comments %! parser = off and %! parser = on to avoid parsing the text between these two comments. The syntax % !TeX parser = off is also supported.
Custom folding regions
You can use either %! region My description and %! endregion or NetBeans-style %! <editor-fold desc="My Description"> and %! <editor-fold> magic comments to specify custom folding regions. They cannot interleave with structural elements like environments or math, but as long as they are balanced they will override the default section folding regions. For more information, see https://blog.jetbrains.com/idea/2012/03/custom-code-folding-regions-in-intellij-idea-111/ and https://www.jetbrains.com/help/idea/code-folding-settings.html
Fake sections
Use %! fake section to introduce a fake section which can be folded like any other section. Here, section can be one of part, chapter, section, subsection, subsubsection, paragraph, or subparagraph. Fake sections can also have a title, so %! fake subsection Introduction part 1 is valid.
Note: if you feel you need to fold code because the file is too big or you lose overview, you probably should split it up into smaller files. See https://blog.codinghorror.com/the-problem-with-code-folding/
Support for user-defined commands
Since b0.7
TeXiFy supports custom definitions (aliases) of label-like, \ref-like, \cite-like and input-like commands. For example, if you write
For definitions like \newcommand{\mycite}[1]{\citeauthor{#1}\cite{#1}}, this means that you will also get autocompletion of citation labels in \mycite commands.
In the case of definitions including a \label or any command that has a file parameter, we check the parameter positions as well. For example,
Autosave and local history
IntelliJ automatically saves files at certain moments, and saves history locally. For more information, see Save and revert changes | IntelliJ IDEA Documentation.
Subfiles
Since b0.6.8
TeXiFy support using the subfiles package. This means that package imports will be placed in the main file when you are writing in a subfile, and imports will be detected correctly. An example of using the subfile package would be:
section1.tex:
Graphicspath support
Since b0.6.9
TeXiFy supports the use of the \graphicspath command from the graphicx package. You can use this to add extra directories in which graphicx will search for images.
For example, if you have images in a path /path/to/figures you could write
You can include multiple search paths by continuing the list, like \includegraphics{{/path1/}{../path2/}}.
For more information, see the documentation linked at https://ctan.org/pkg/graphicx
Unicode support
IntelliJ supports Unicode, see for example https://blog.jetbrains.com/idea/2013/03/use-the-utf-8-luke-file-encodings-in-intellij-idea/
Note that if the LaTeX log output contains characters in an incorrect encoding on Windows, you can fix this by going to and add -Dfile.encoding=UTF-8, then restart your IDE.
Also see the Unicode inspection.